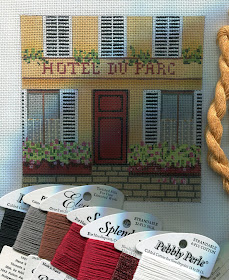
I told you earlier about the Mt. Tam Canvas Workers auction I attended. Well, here's one of the canvases I impulsively bid on and won. It came with thread, stretcher bars, and a zippered pouch to stash everything in. And all for under $40 - WHAT A DEAL!
This little 6" x 6" canvas is so cute, I want to start stitching on it PRONTO. But first, I have to do some canvas prep work. And I thought I'd share a few of my techniques with you.
[ASIDE: I know most of you already use these same techniques, but recently I answered an email from a stitcher who was attempting her first needlepoint canvas and had some very basic questions about starting out. So I thought this would be a good project to prepare using some basic tips.]
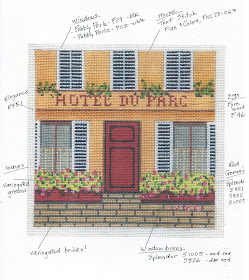
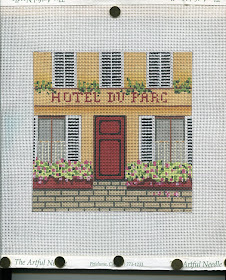
FIRST: If you're working on a painted canvas, here's a really good tip before you start stitching: MAKE A COLOR COPY OF YOUR CANVAS. Why bother? Well, it may save you some headaches down the road. Take this hotel canvas, for instance.

I've made a color copy that I can use to write my notes - showing what threads and stitches I'm going to use on my canvas. This creates a really good road map for your work in progress. (This can be especially valuable if you set the project aside and forget about it for a few months or so. When you pick it up again, you'll remember what you were going to do.) And as you're stitching, it reminds you what the canvas looked like before you started.
But the more important reason to have a copy of the canvas to refer to happens when you layer stitches. Look at those flower boxes on the canvas above. I'm planning to do some irregular stitches (lazy daisies, maybe?) for all the leaves. After I'm done with all the greenery, how will I remember where to put the flowers on top??Well, with my color copy to refer to, I can place the red flowers on top to match the original design of the canvas.
Okay, now you're ready to mount your canvas to stretcher bars. First, I recommend putting the bars together in L-shaped pairs, then put the two L-shapes together to form a square frame. (This is the way I learned to put stretcher bars together in art classes, and it's always worked better than assembling the frame one piece at a time and getting a wobbly shape instead of a true square.) Then make sure your bars ARE square (I test it against the square edge of a table and push it into a true square if I need to.)

NEXT, attach the canvas to the squared-up frame. Most stitchers use tacks (although I've also used a staple gun) so we'll use tacks here, too. Tacks are very handy: they are reusable, which is great AND you can take them out and reposition them if/when your canvas gets a bit loose.
As the above photo shows, start on one side first (I did the bottom edge first - putting my first tack in the CENTER of the canvas edge. Then I placed the remaining tacks first along the left side (pulling the canvas a bit to make it taut), then along the right side (pulling it a bit to make it taut). [ASIDE: You can use as many tack as makes you happy. I usually put a tack every 2-3 inches, depending on the canvas size, but I've seen stitchers put tacks every 1/2 inch... just depends on your personal preference.]
Then, I move to the edge OPPOSITE the first side, placing the first tack in the center (as shown above) and then continue tacking one side down, then moving over to the other side. I repeat this process with the two remaining canvas edges. I test to see if the canvas is taut enough for my stitching. If it isn't, I remove a few tacks and replace them so the canvas is taut enough. When I'm sure the tacks are properly placed, I'll push them further into the wooden bars.
Okay...now I'm ready to stitch!
On tacking: I put one in the middle on each side first, then pull each corner taut and put one in each corner, finally finishing by putting as many other tacks as I feel necessary. Of course, everyone has their own method, just thought I'd share mine :)
ReplyDeleteI like your use of a color copy of the canvas. I have a friend who has trouble seeing colors, so we make a photocopy of the canvas and mark where the colors go. It's nice to see others do the same thing.
ReplyDeleteI'd never thought of photocopying a canvas as a notepage. That's brilliant!
ReplyDelete