Friday, November 30, 2012

"Fields of Gold" Friday

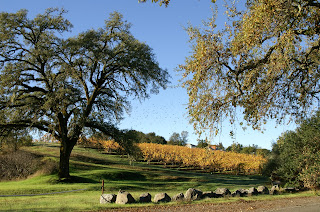
Last Thanksgiving weekend, I hopped in the car with my camera and took these early morning shots of the hills and vineyards around Cloverdale, which I think is technically called the "Anderson Valley" region of the Sonoma wine country.  The colors were amazing, as I think you'll agree..... 


At one point, as I was driving, I paralleled a HUGE flock of starlings (I think that's what these birds are) that migrates through this area every year.  I pulled over to watch as they roosted in a cluster of tall trees, then every now and then rose en masse and circled over the vineyards.  Their noise was a terrific roar; rather like a high-pitched waterfall - constant, deafening and completely overwhelming.


Happy Hectic Friday!

Monday, November 26, 2012

Mini Mystery Monday, November finish

Now that you have the foundation work completed on your November piece, it's time for the fun stuff: adding the final touches that really make this ornament special.

Here's the final November graph for you to use:


And here's the up-close graphs for the acorn and leaf elements you can work in the boxes:


You can choose to work both of these elements, as the graph shows..... or, you can pick just one of the elements (either the acorn or leaf) and stitch them in both boxes.  (FYI: Turn your leaf graph around, so the second leaf goes in the opposite direction.)   Just an idea: You could also attach seasonal buttons in those open spaces, if you'd like something a bit more dimensional and fast!

And Ho, Ho, Ho!  For an extra treat, I've graphed a few simple holiday elements that can be substituted in those box spaces, if you would like to re-stitch the design in festive holiday colors:


How's that for a truly multi-purpose ornament, that's easy to stitch, and fun to use up odds and ends of threads?!

By the way, here's how my model turned out, with both elements in place (it has a sort of rustic sampler look to it, doesn't it?):


You'll see that I used metallic french knots in place of gold beads -- either beads or knots can be used to finish your piece.  You might also notice on my outer border areas, where the two patchwork sections meet, I laid a gold straight stitch, to separate the different patterns.  I thought it looked more "patchworky" that way, but please use your own judgement for how you'd like to finish YOUR PIECE.

I hope you've enjoyed stitching this one; there are soooo many different ways you can change this design, I'm sure you'll have fun playing around with it, and whipping out a few gift ornaments, if you're so inclined.

See you on another Monday......

Thursday, November 22, 2012

Wednesday, November 21, 2012

Forgotten Projects

I've been so busy stitching "work" projects, I haven't had the time or energy to work on other "fun" projects lately.   But this past weekend, after finishing yet another holiday design that I'll be revealing very soon (hopefully next week), I decided to take a trip to The Island of Forgotten Projects. 

Yeah, you know that place -- the one where all your started and half-done projects are languishing until you remember them and decide to pick them up again and get back to work.... (Let's not reveal how many of those you have, okay? And I won't bore you with mine, either...)

Anyway, because it's a dreary rainy Novembery time of year, I pulled out my beloved Village of Hawk Run Hollow by Carriage House Samplings that I started, lo, these many years past.  I had forgotten how much fun it was to work with its autumnal colors, with all the itty bitty details of this piece.  And every night this week I've been working on it, as I sit in front of the fireplace and stitch.

So I'm pleased to report I've finished the second row of vignettes.  Which means, officially, I'm HALF-WAY DONE!!  (drum roll, please.....)  Here's how it looks now:

I slightly altered the block on the left side, where the orange arrow is pointing, so the dogs look more like dogs (previously they looked like goats, and that didn't make sense to me).


And over on the right side, in the blacksmith shop, I made the foreground horse into an Appaloosa (which tickles my fancy no end, since I love those particular critters!) and omitted the shopowner's name by substituting more horseshoes, where the pink arrow is pointing below.


I'm dee-lighted to get that row finished.  Isn't it funny how you sometimes hit an invisible wall on projects, for no discernable reason, except you Just Don't Want To Stitch It.  I felt that way about all the riders in the blacksmith block; all those fiddly little riders, with their different colored shirts and hats stopped me cold and made me put this project away. For over a year, as it happens.

But now, after breezing past those silly little bits without batting an eye, I can proudly turn the scroll bars and move along to the next row.  Which has Three New Blocks!  It's like starting three new projects.  Woo Hoo!  I'm on a roll here, so I hope I can keep the evening stitching momentum going .... But with any stitching project (as you well know) it's hard to predict what's up ahead, what parts might bore you or frustrate you, or what might trip you up again down that long, long stitching road. 

In any event, it's nice to know there's always the Island of Forgotten Projects to go back to.... to retrieve and re-discover yet another favorite old project, or maybe even to put one back for an un-disclosed amount of time until you're ready to work on it again....

HAPPY THANKSGIVING, ONE AND ALL!  May your long weekend be filled with good friends & family, good food, and  let's not forget -- our very good projects!
Monday, November 19, 2012

Mini Mystery Monday for November, pt. 3

Ready to fill in more of the borders?  Let's get started!

Here's the next graph for you to use to fill in more of the patchwork areas:


and here's the up-close look at the "Dimpled" Square you will be creating using more of your fall leaf color (or you can even introduce another fall color in this area, if you want more colors to your piece):


Using these "dimpled" squares instead of full mosaic squares leaves you with a place to add a bead or french knot.  Or you can even add a small tent stitch in a different color, for a very discreet color change.

And for those gold Rhodes Squares in the corner boxes, here's a close-up graph for you:


Okay.... now we're ready to add the fun stuff in the middle -- which is next week's exciting installment.  Can you guess what will be inside those empty boxes?  Think about what you'd like to put in them, and next Monday I'll show you what I've chosen for you to stitch!! 

Friday, November 16, 2012

Counted Jewels


Just a few weeks ago I got the idea to create a new set of holiday ornaments for this season.  This time, instead of using traditional quilt blocks for inspiration, I focused on pure geometric designs, using very basic kinds of stitches and this is what I came up with:


I'm calling this set of four designs "JEWEL ORNAMENTS", since each one has a topaz Swarovski crystal in the center, plus a handful of other gold beads for extra glitz and holiday glamor!  (Trust me, these photos don't do justice to the vibrant color and  sparkle of these pieces...and the Swarovski crystal is a deep rich gold that - try as I might - simply won't show up on the scanned photo.)

Since my other two HOLIDAY ORNAMENTS patterns used the traditional red and green colorways, I really wanted to stitch other colors, so I chose a slightly different mix of fuchsia (or cranberry, if you prefer) with a touch of lime green.  Here's what one of the ornaments looks like up close:


And here's the traditional red and green version stitched up as well, which is equally sparkly and festive:


Because they are all stitched "on point" they measure 6" x 6" at the widest point.  Also included in the pattern is a set of four different borders that you can stitch around the diamond shapes, to turn them into 6" x 6" squares.  Which would make terrific projects for box or pillow inserts. 

I enjoyed stitching all of these models because they were so fast and fun to work up. (Ahem, great TV projects, don't you know....)  Really nothing too difficult here, and seeing all the colors and metallics come alive on such a small canvas makes for a very pleasurable stitching experience!

The pattern lists the threads for both colorways (fuchsia & lime or red & green) and as always, you can certainly mix & match your own colors and use these ornaments as decorations for other seasons besides Christmas...

If you're itching to start a fast and fun holiday project to get you in the mood for the holidays, please check out my new JEWEL ORNAMENTS on my website at Laura J. Perin Designs.

Monday, November 12, 2012

Mini Mystery Monday: November, pt.2

I hope you have all your stitching from part 1 done, because now we can add a bit of color in the next segment.....

Here's the graph to follow this week:


and here's the up-close look at how to make the little floral motifs:


As the graph shows, I've used a rusty orange pearl cotton to create these little floral elements, then added a cross stitch on top, using a metallic gold braid.  It's a simple but fun way to make little flowers that are good for filling in small areas.

You can see that things are starting to look interesting now, aren't they?  We've got the beginnings of a "patchwork" effect going, so next time we'll fill in the other patchwork borders.  See you then!

Monday, November 5, 2012

Mini Mystery Monday for November, pt. 1

It's time for another mystery piece, and this time it's sort of a mini sampler that celebrates the season....

Grab a handful of threads in fall colors:
   - a variegated Watercolours that has your favorite fall colors
 (you'll only need 4 or 5 of the 3-ply strands; I used a bit of Watercolours  285, "Sherwood Forest")
   - a dark color #5 pearl cotton for the borders
 (try medium-to-dark greens or browns; I used green DMC 3345)
   - a bright color #5 pearl cotton that reminds you of fall leaves (I used rusty orange DMC 920)
   - two #5 pearl cottons that are a nutty brown - one light and one dark
(just a strand or two of each is all you'll need, and not until the final lesson, so there's no hurry on that one!)
   - a Kreinik #8 Braid in your favorite gold (I used 002HL)
   - a piece of 8" x 8" 18 ct. canvas in sandstone or tan or eggshell is fine, too.

Here's the first graph for you to start your stitching:


From the center of your canvas, start stitching the Large Cross variations, using 1 ply of your variegated Watercolours.  Work outwards until you reach the narrow border lines, then stitch those with 1 strand of your border color #5 pearl cotton.  

Work the remainder of the Large Cross sections, and then start on your wide outer borders.   You can go back and add the gold squares in all the border intersections, using 1 strand of your Kreinik #8 Braid.

Here's an up-close graph of those Large Cross variations (I don't know what else to call them!):


These are rather odd stitches, in that the large cross goes over 5 x 5 threads, then you add pairs of straight stitches on top.  What I like about this composite stitch is how "bumpy" it is.  It creates an interesting texture when you fill a larger area, and they remind me of little raised "buttons" on the canvas.  Go ahead and stitch a few, and see what you think....

Next Monday we'll add some more color and texture and little by little, this design will start to POP!
(Trust me, this is a really fun one to stitch up and there will be several interesting options for you to play with down the road...and when you get further along, you'll be saying, "oh yeah, this is definitely a Novembery piece...")    See ya next time!!